When I visited Japan last summer, one thing that stuck with me was the police stations guarding the Imperial Palace in Tokyo. Inside was a police officer watching the pavement and the street. What made the experience unusual, however, was the weapon the officer had. In Europe, America, or Australia, policemen are heavily equipped with multiple types of lethal firearms. Surprisingly, this officer had just a stick. Nothing more, nothing less.
Sasumata, translated as spear-fork, is a tool credited with originating in the Edo period. Interestingly, it is not exclusive to Japan. Europe had its own medieval version, and tribes in Papua New Guinea used a similar tool as well. Furthermore, the modern version is heavily used by China’s police force.
I knew about Sasumatas before coming to Japan; however, seeing one in person made me want one. This makes the plan for today’s week quite simple! Let’s make an overengineered self-locking Sasumata.
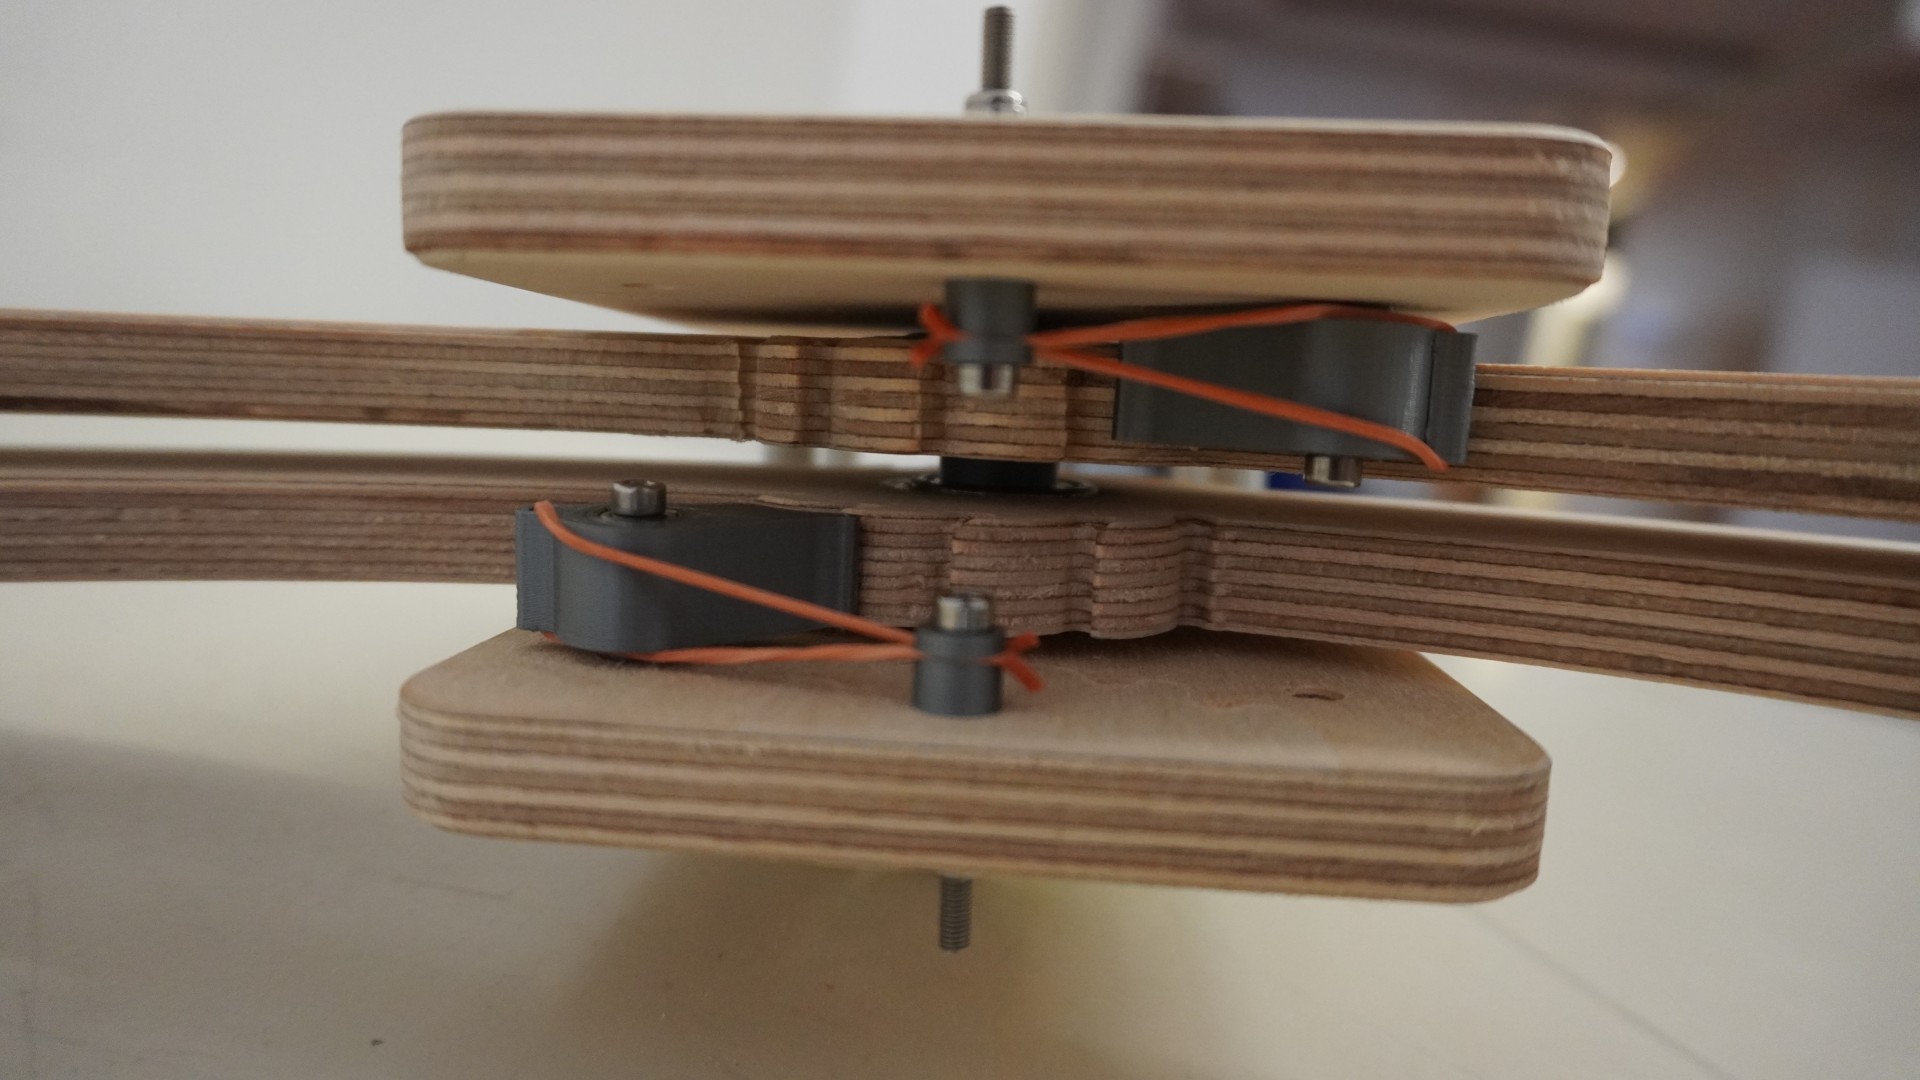
I have decided to base my self-locking design on the ratchet mechanism. It consists of a ratchet wheel and a pawl (spring-loaded pin), which enables rotation in one direction, however, blocks it from going the other way. This is exactly what we need from our Sasumata. To keep the pawl from opening, I added a rubber band that pulled it against the wheel. This would prevent accidental release while handling the device. Since we are making everything out of wood, I included large bearings to minimize the joint friction.
We begin the design by modeling a Sasumata with a ratchet mechanism built into the clamps themselves. They are attached via a large bearing to the base of the device. The top and bottom clamps have a larger spacer connecting the entire assembly together. To increase rigidity, I have added 4 standoff spacers at the other end of the baseplate.
A pawl was designed to mimic the geometry of the ratchet wheel, and a rubber band will be used to tension the clamp. This makes up the self-locking mechanism of the Sasumata. The pawls have two small bearings on the inside to facilitate smoother movement. One drawback is releasing the locked clamps. It’s quite difficult, as the pawls need to be opened by hand. This makes escaping from the bottom much quicker.
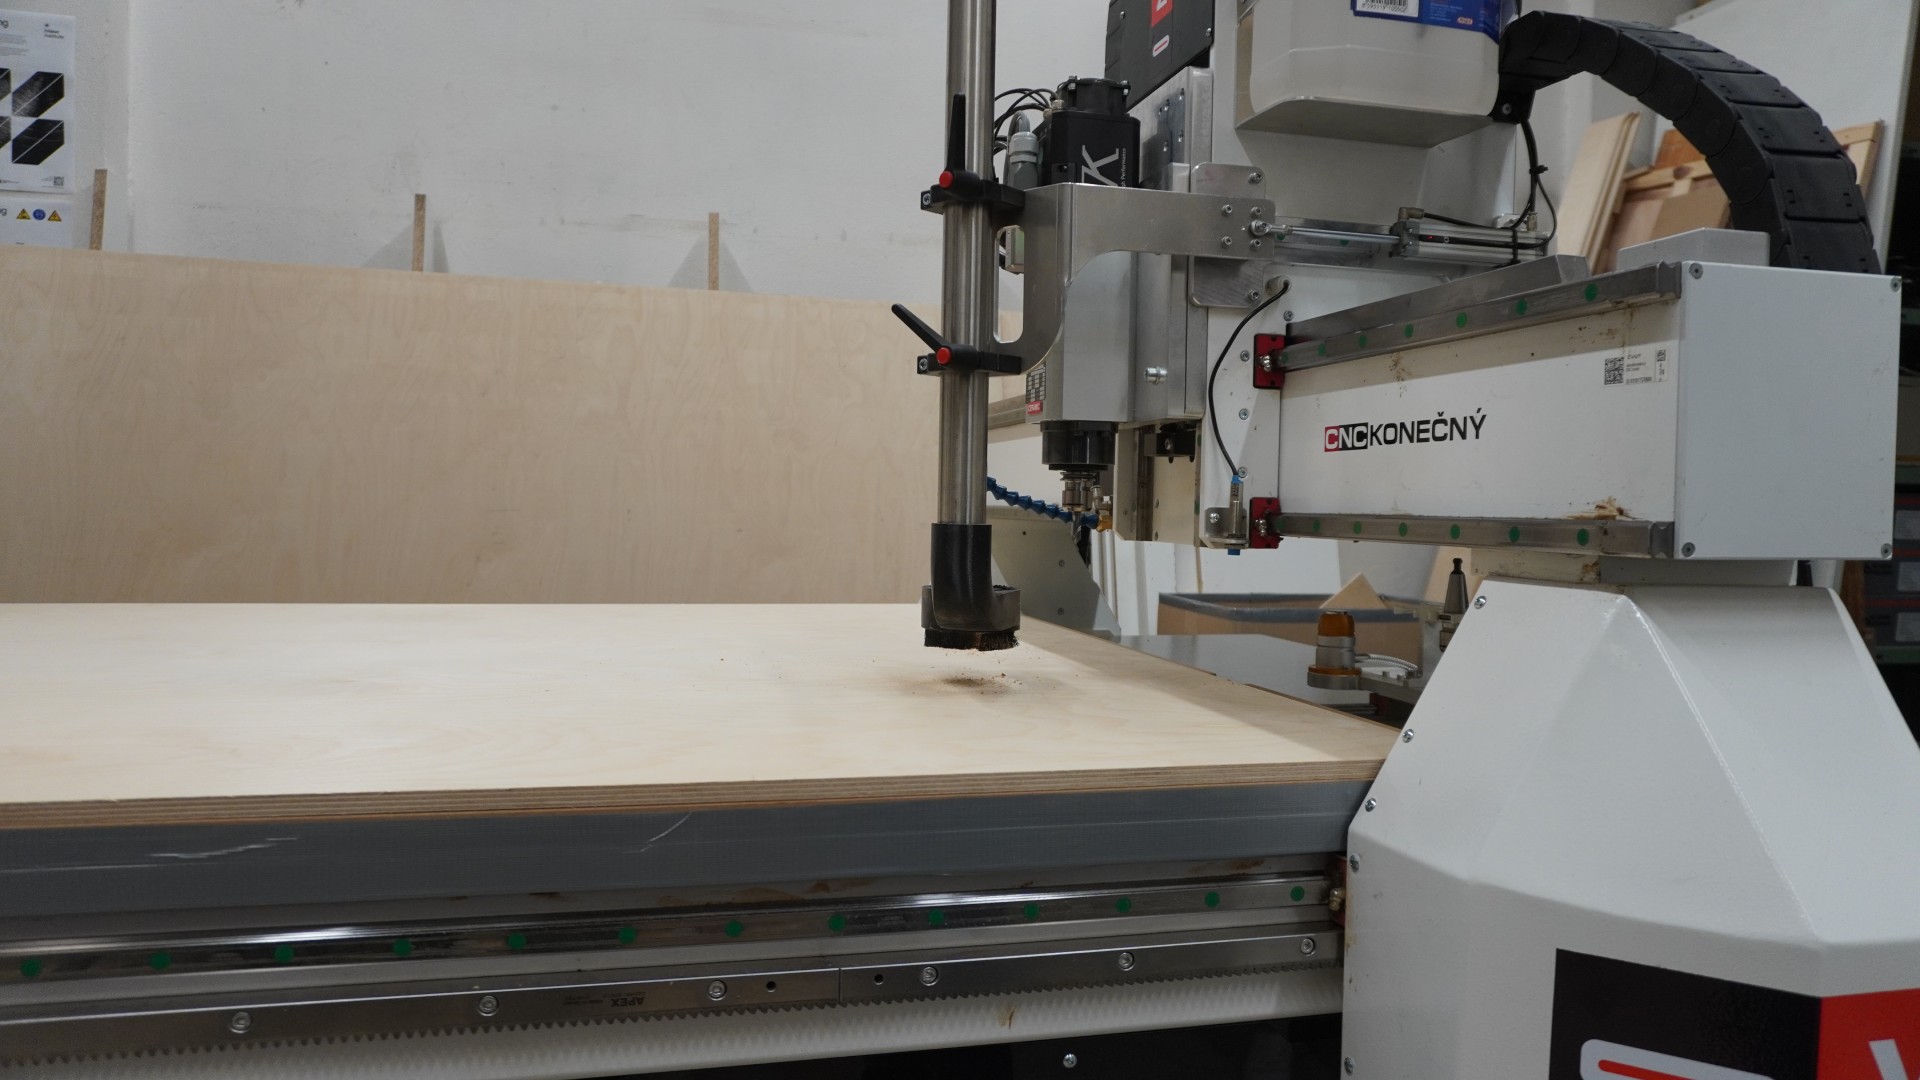
The machine we will be using is the RM MX Light by CNC Konečný. It features a 2.1kW 24000RPM spindle with a build volume of 2090x3100 mm. It can cut soft metals such as aluminum or brass; however, we’ll make our model out of plywood.
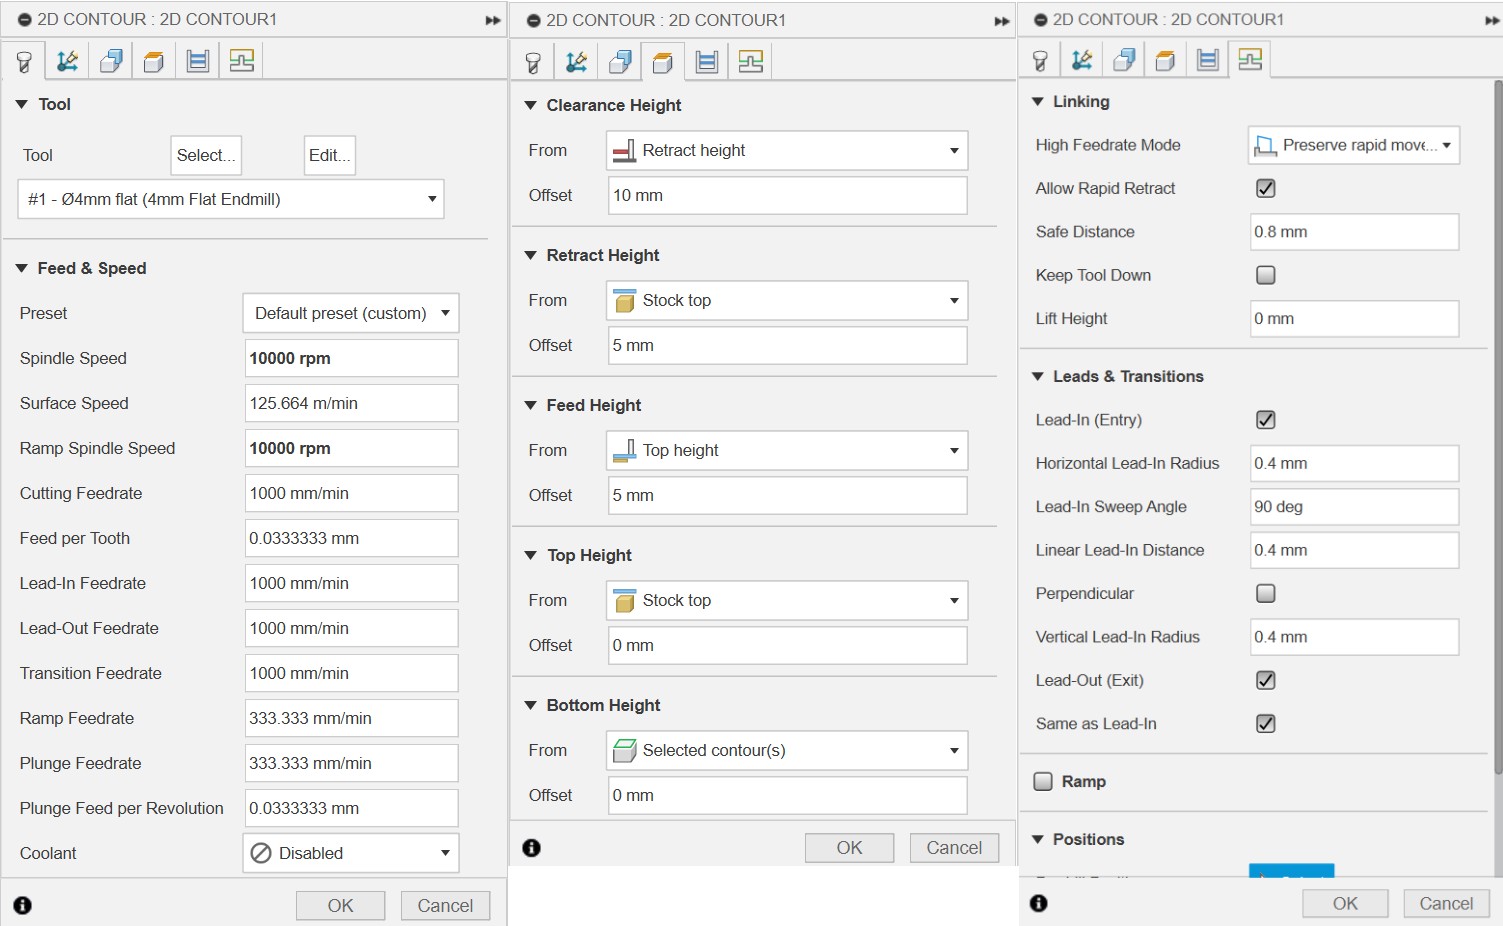
When it comes to CNC machining, toolpaths play without a doubt one of the most crucial roles in the entire process. We start by creating a setup for the machining operations. We were instructed to place the origin point in the bottom left corner of the stock material. The setting for the setup can be seen below:

Next, we select the operations. The entire part can be made with just three operations. Generally, we want to drill first while the stock is still in one piece. Only afterwards did we cut the part, as it would adhere to the fixture much less.
We begin by doing a 2D Adaptive Clearing to make the holes for the bearings inside the clamps. For the tool, I went with the 4mm flat endmill. The spindle speed was set to 10000 RPM, and the rest was kept as a default preset. Furthermore, the coolant was turned off. It is important to set the bottom and top heights of the operation correctly. The setting for each operation can be seen in the images below.

The next operation was drilling, where we used the 10mm 90deg spot drill. The spindle speed was kept at 10000 RPM. This process drilled holes for all the screws within the base.

The final operation was a 2D Contour, which traced out the entire clamp. Again, we have used the 4mm flat endmill, so the setup is almost identical.
The results were quite surprising as the mechanism worked on the first try. The extended ends of the clamps pushed against the person, which helped close the mechanism. Unfortunately, the bearings inside the pawls were too small and gave way under the loads exerted on the arms. This made the ratchet stop working after a few tries, and a larger bearing needs to be installed in order to fix the issue. Interestingly, the Sasumata still retained some degree of self-locking purely by its design.

